Alilo G6/G6s PCB Replacement
This document provides the necessary steps for PCB replacement of Alilo G6/G6s. If you don't plan to read the document below, you can also refer to the video below.
Requirements
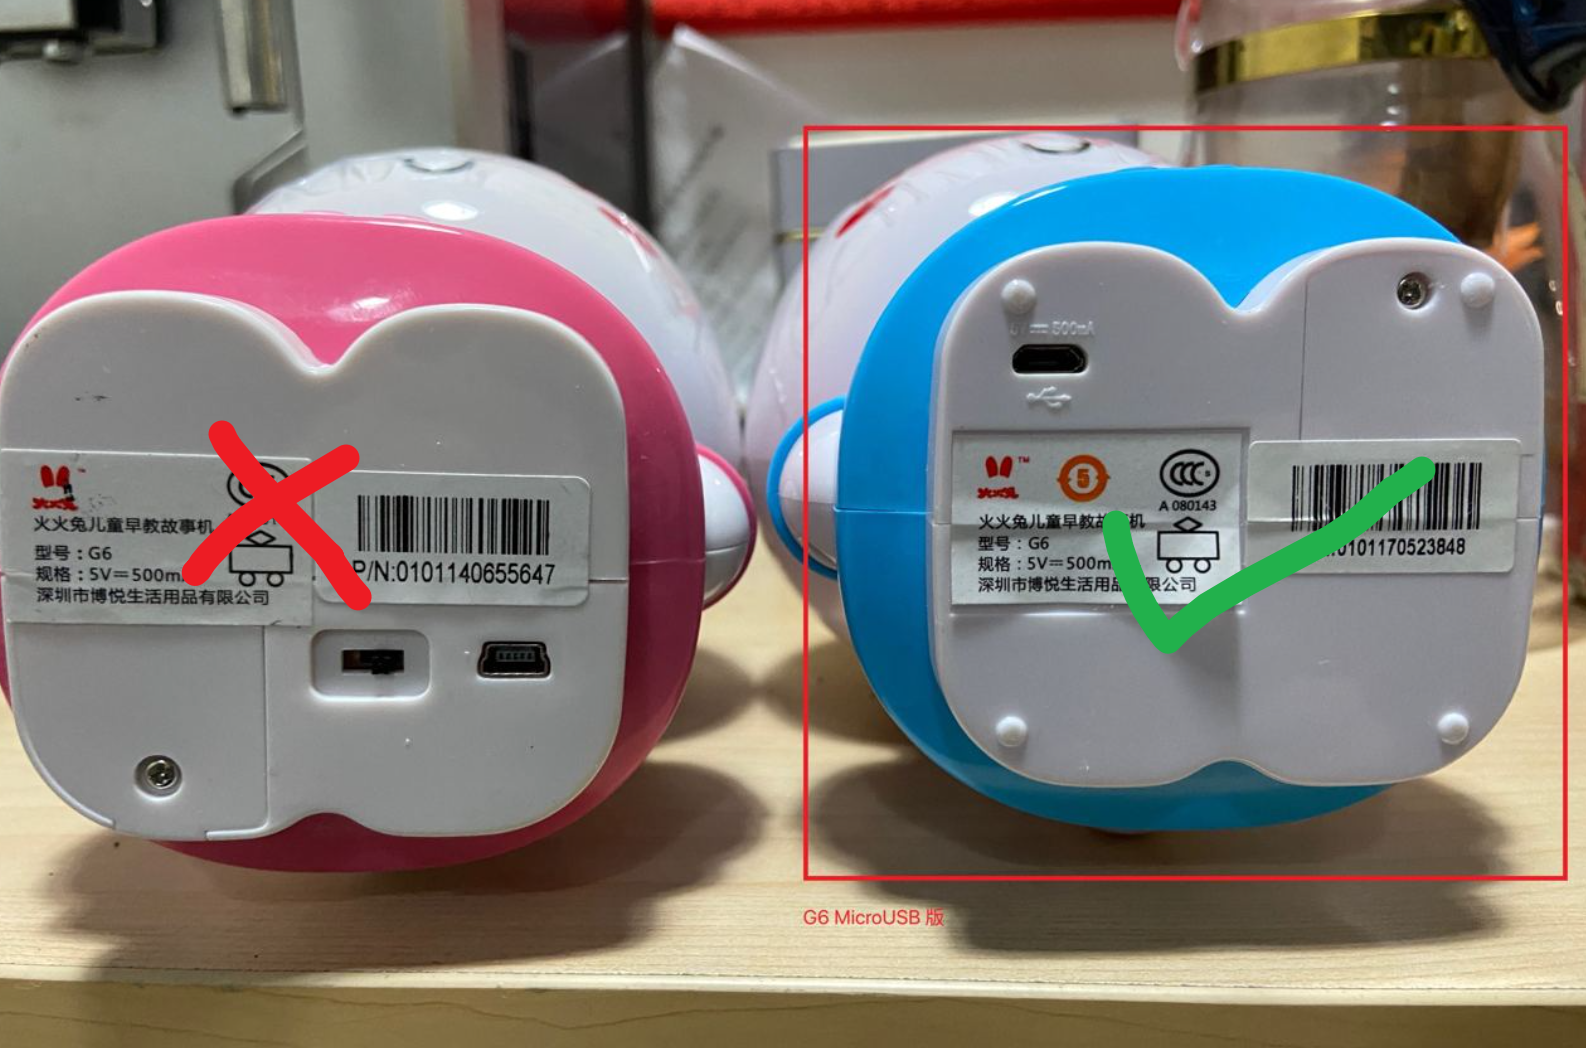
When purchasing the G6, make sure not to buy the wrong model. The replacement circuit board only supports the G6 with a MicroUSB interface on the right side.
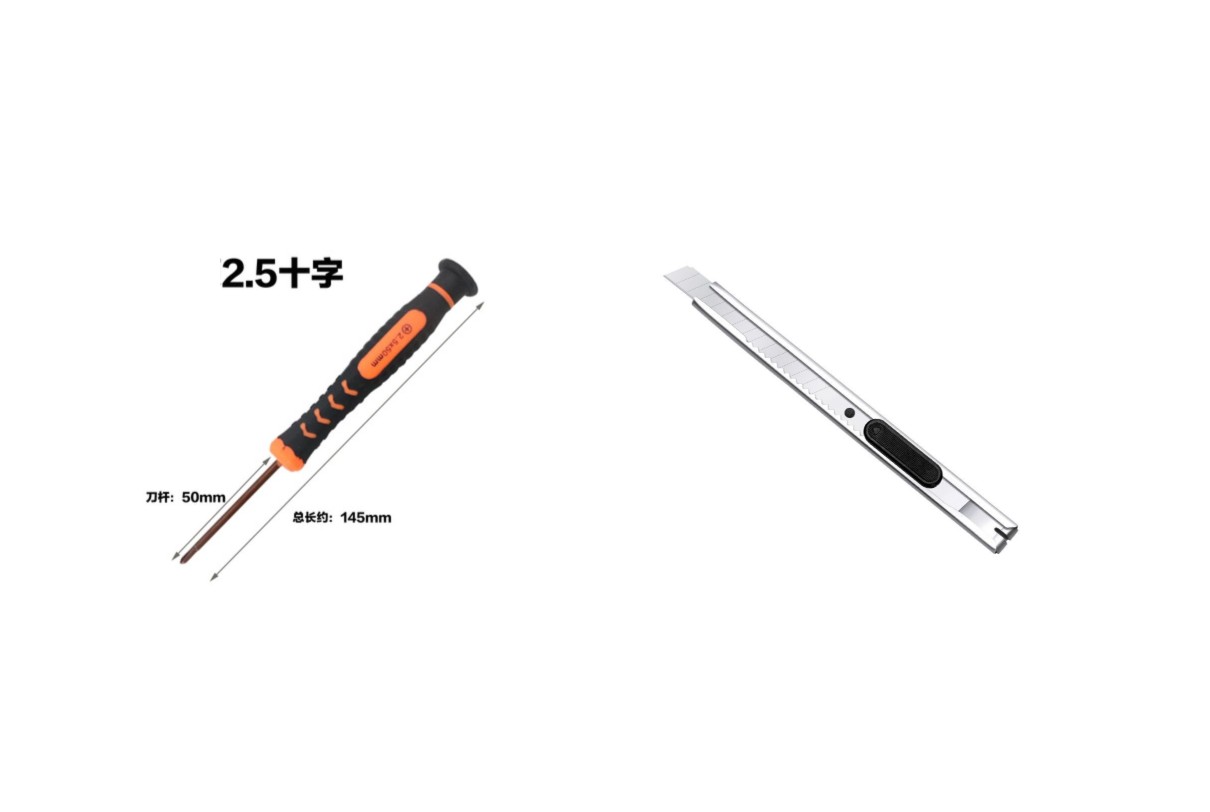
- A cross screwdriver with a diameter of 2.5mm and a length of over 5cm.
- A utility knife, used to remove the adhesive on top of the PCB socket.
- A functioning Alilo G6 can be purchased on major e-commerce websites.
- A replacement circuit board for the G6, produced by FoloToy, can be purchased at: https://gf.bilibili.com/item/detail/1104222005.
Instructions
- Check if the recording and playback of Alilo G6 are normal.
- Use a screwdriver to unscrew the 6 screws on the back of Alilo G6.
- Carefully open the casing of Alilo G6, unplug all plugs on the motherboard, first unplug the power plug, there is glue on the plug, you can use an art knife to gently cut it open, be sure not to cut your hand.
- Unscrew the 4 screws on the motherboard and remove it.
- Replace the original motherboard with FoloToy's motherboard and tighten 3 screws to fix it.
- Plug in microphone, light, speaker and power sockets, finally plug in power socket.
- After plugging in all sockets, do not close the casing or install screws yet. First turn on/off switch on rabbit's tail to see if newly installed light can turn on and flash slowly in blue color.
- If there is no problem, install the casing and tighten screws to complete replacement process.
Wi-Fi Configure
Network configure and server configure
How to enter pair mode
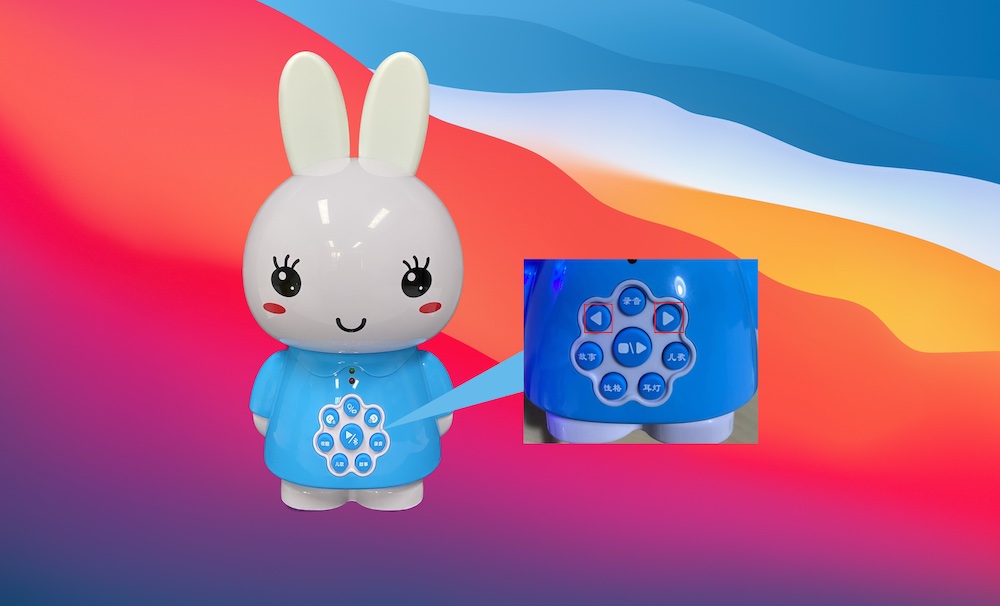
imultaneously press and hold the previous/next button for more than 5 seconds to enter configuration mode. At this time, the light will gradually change to blue.
Starting a Conversation
After assembling the toy, completing the network configuration, and connecting to the server, hold down the large circular button in the middle for conversation. Release it to end the conversation. The 7 small circular buttons around it are character switch buttons. Clicking on them will activate character switching, and the numerical values on these buttons correspond to the keys in roles.json.

