Octopus Ultra Edition
This guide is designed to introduce users to the Folotoy Octopus Ultra AI Development Kit, including its features, configuration options, and how to get started quickly. The Folotoy Octopus Ultra AI Development Kit is aimed at AI voice dialogue applications and educational purposes. To purchase the development kit, please visit our Taobao store 「FoloToy Official Store」 or 「Bilibili Workshop」.
Overview
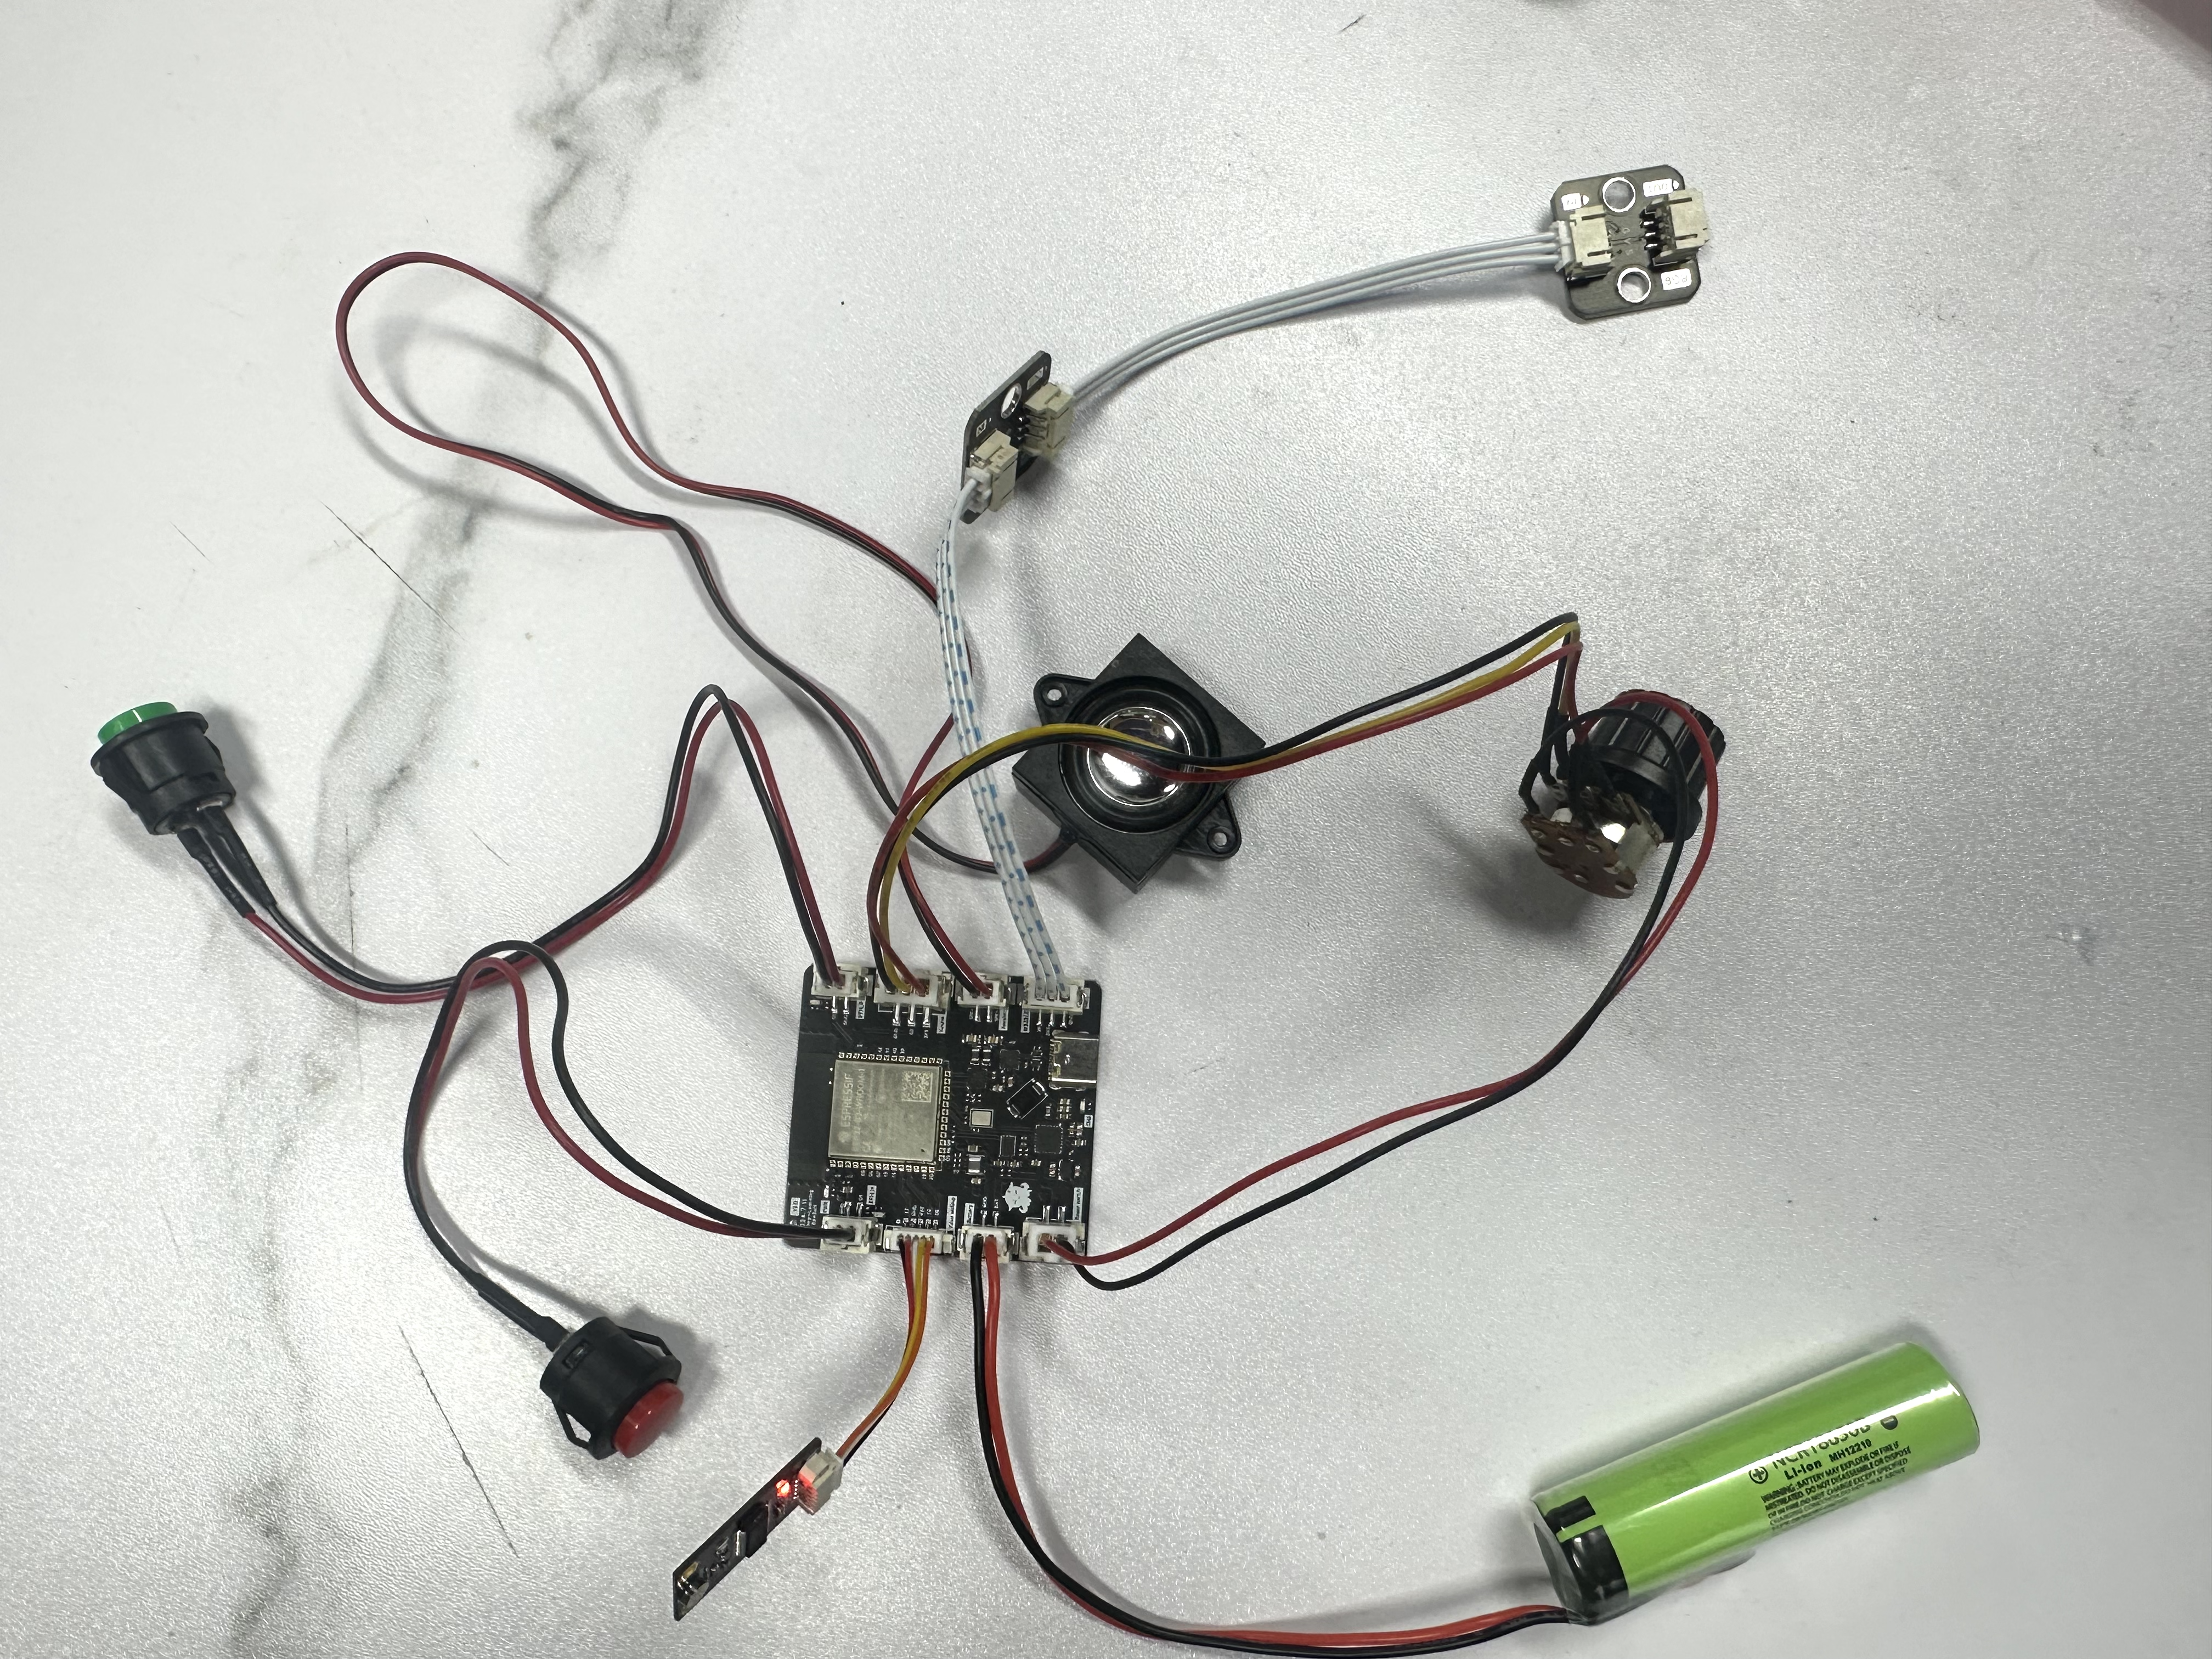
The Folotoy Octopus Ultra AI Development Kit includes the following components:
- ChatGPT AI Voice Dialogue Core Board Folotoy Core 1 piece
- Peripheral Expansion Board 1 piece (approximately 40mm*54mm)
- Speaker 1 unit
- Electret Microphone 1 unit
- 3.7v Lithium Battery 1 unit, supports Type-C charging
- Function Buttons 2 pieces
- Volume Control and Switch Knob Module 1 unit
- Programmable RGB Light Module 1 set
- Type-C Data Cable 1 piece
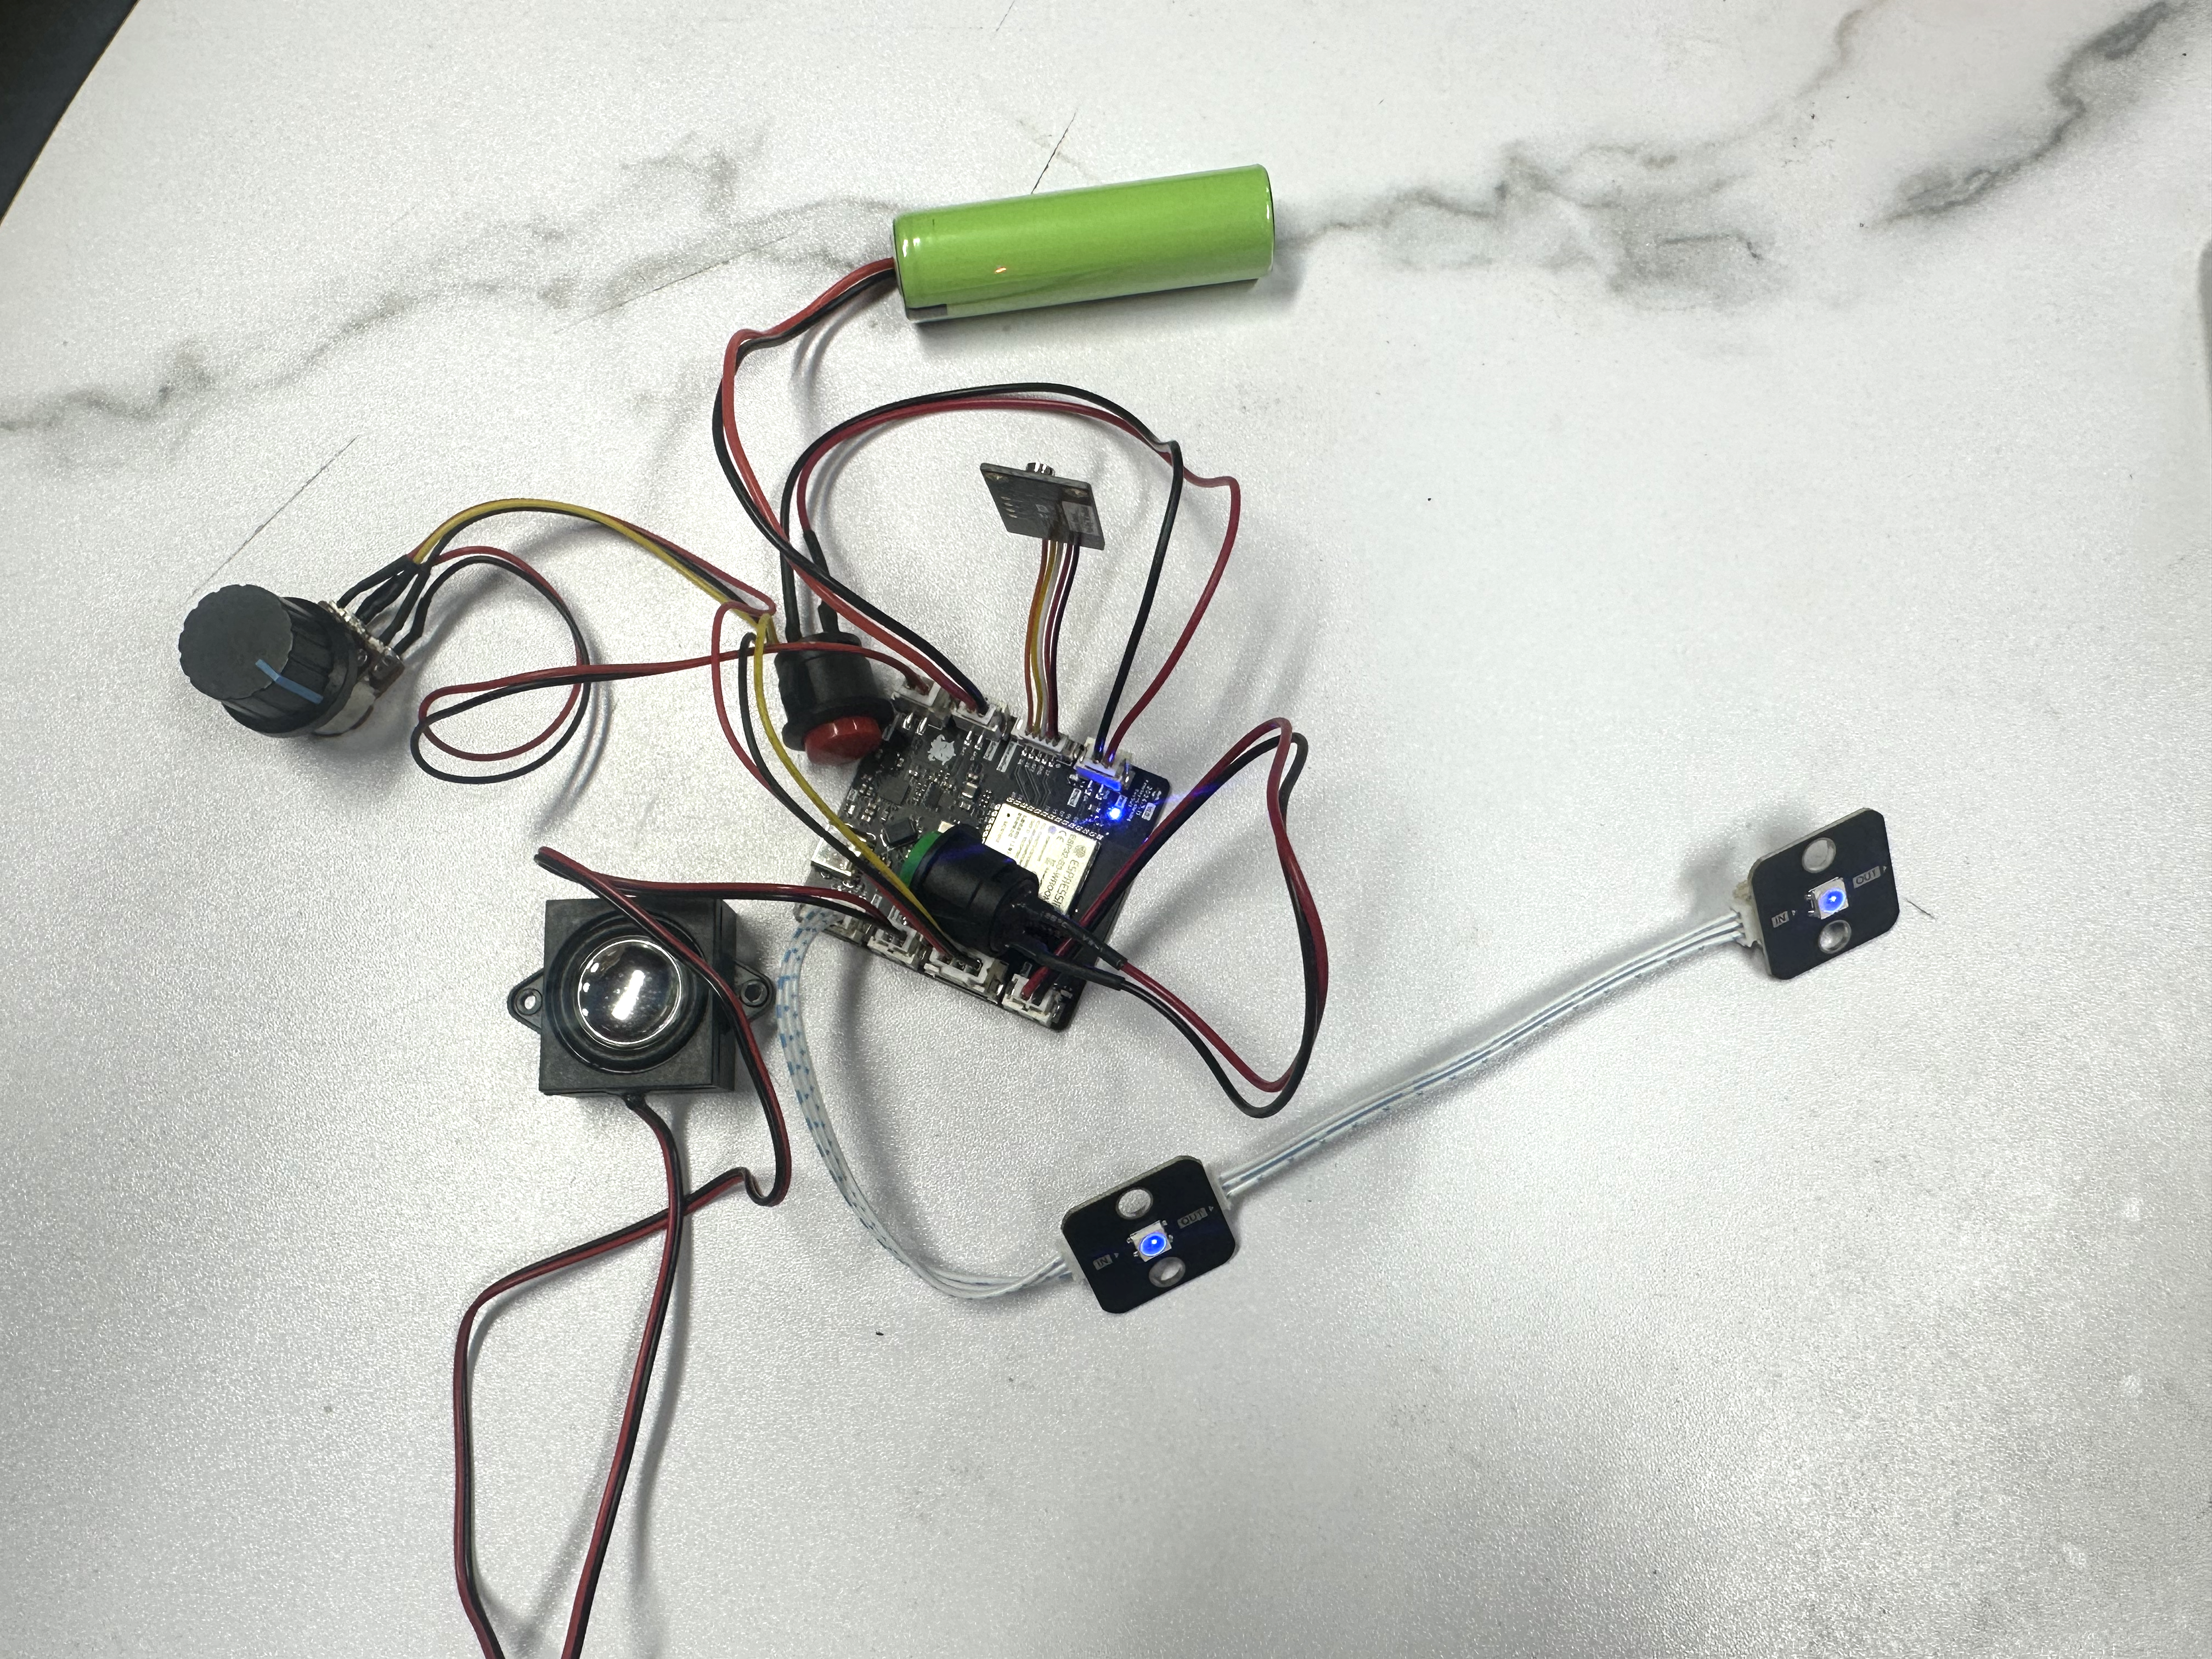
Assembly
Connecting Components
Interface Correspondence
According to the English labels on the board, connect the components as follows:
| Interface Label | Component |
|---|---|
| Volume, Power switch | Volume Control and Switch Knob Module |
| Speaker | Speaker |
| Battery | Battery |
| WS2812 | RGB Light Module (Connect from the board's RGB interface to the module's IN port, then from the module's OUT port to the IN port of another module) |
| BTN_A | Dialogue Button (color optional) |
| BTN_B | Role Switch Button (color optional) |
| Voice wakeup | Voice Wakeup Module |
Powering On
Once all components are connected, rotating the switch will power on the development board and enter configuration mode, with the LED light displaying a "🔵 blue breathing effect." If the switch does not work and the board powers on automatically, you can adjust the small switch on the core board to change the configuration.
Congratulations, you have completed the assembly of the Folotoy Octopus AI Development Kit.
Wi-Fi Configuration
Device Configuration and Server Setup
How to Enter Configuration Mode
- Press and hold Button B for more than 3 seconds; the LED light will turn to a blue breathing flashing state.
- Open your phone and connect to the Folotoy-xxxx Wi-Fi hotspot; your phone will automatically open the network configuration page where you can configure the Wi-Fi name/Wi-Fi password/server IP/server port.
- Once the LED is in the blue breathing flashing state, the configuration process is the same as the initial setup.
Starting a Dialogue
Follow these steps to start a dialogue:
- Long press Button A; the LED light will turn green and stay on, indicating that recording is in progress. You can then speak into the microphone.
- Release Button A when you finish speaking; the LED light will turn to a green breathing flashing state, indicating that the AI is processing.
- After about 2-5 seconds (the time may vary depending on network delays; it may be longer or result in a timeout under poor network conditions), you will hear the speaker providing a response.
- Short press Button B to cycle through roles; the server can be configured to support 7 different roles.
- If the voice wakeup module is included, the default wakeup word is "hi folo" (sounds like "follow"). When the device detects the wakeup word, it will play a “received” sound prompt, and you can then speak directly to the device. The device will automatically stop recording after you stop speaking (if it fails to recognize the end of speech, use AT commands to adjust the voice threshold. For AT command usage: AT Commands)